Scan Table
In this step, we will scan all the data in the DynamoDB table.
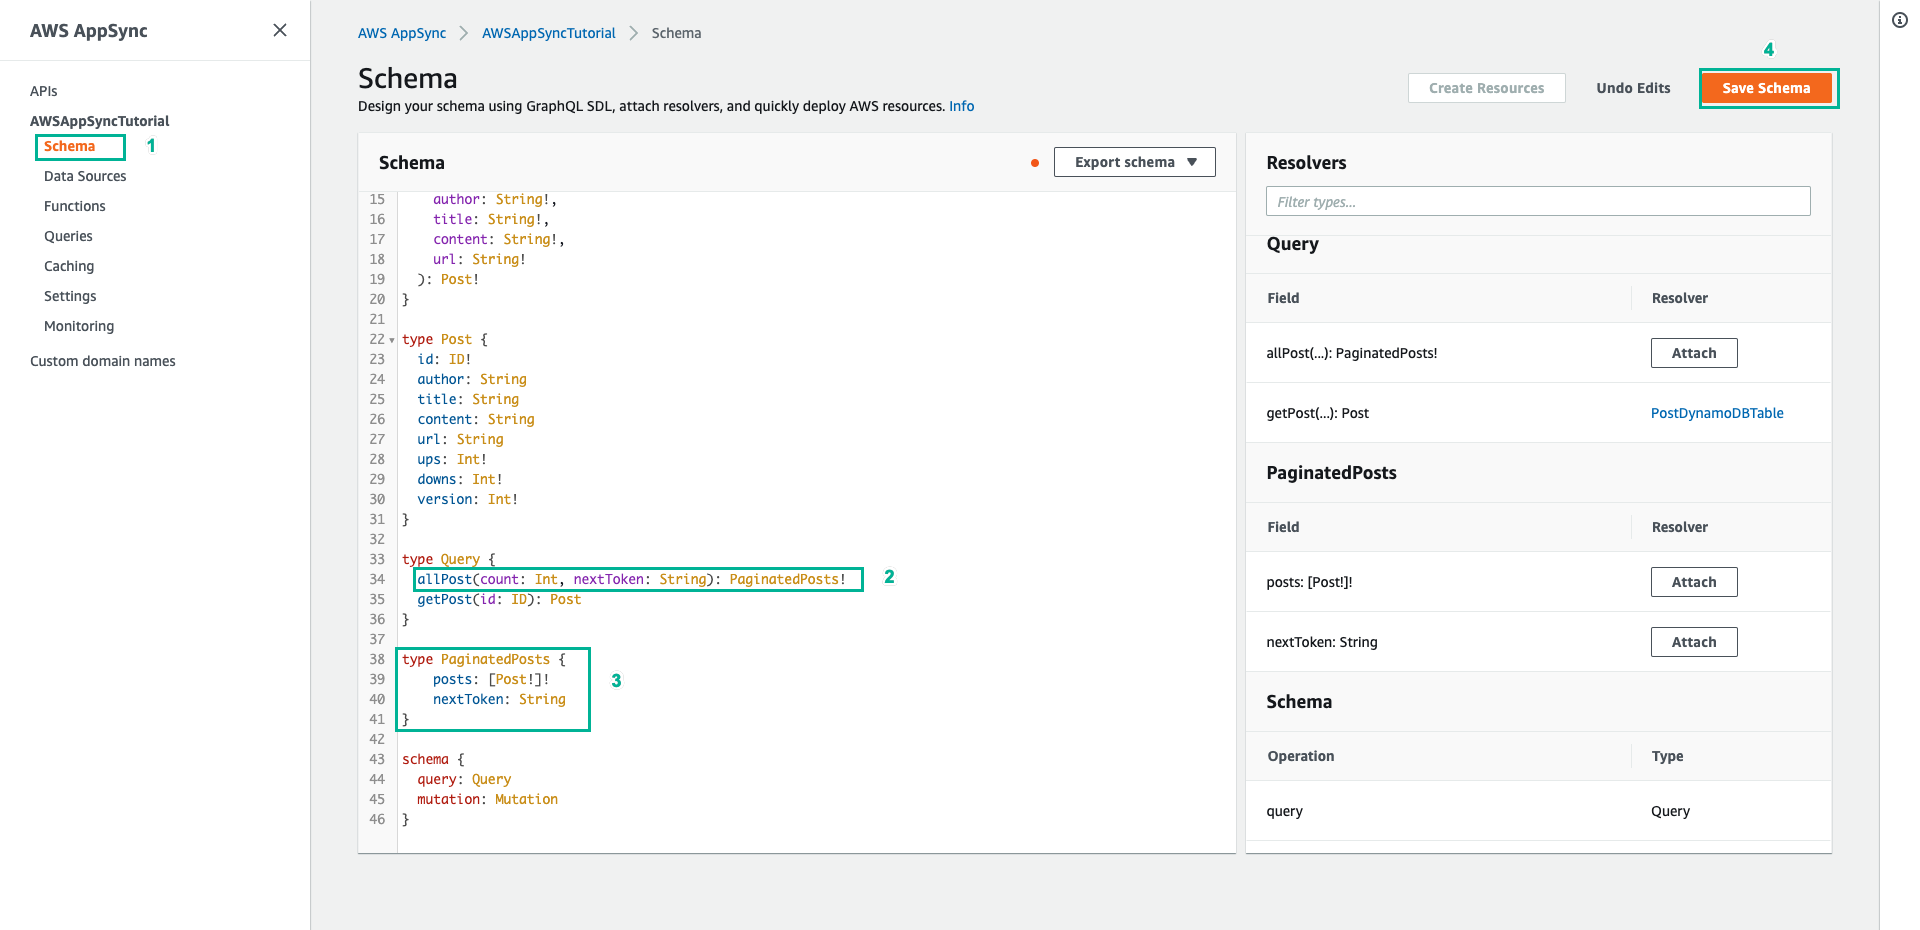
- Select the Schema tab
- Add the line below to the Query type to add a new query called allPost
allPost(count: Int, nextToken: String): PaginatedPosts!
- Add the new PaginatedPosts type
type PaginatedPosts {
    posts: [Post!]!
    nextToken: String
}
- Then click Save Schema
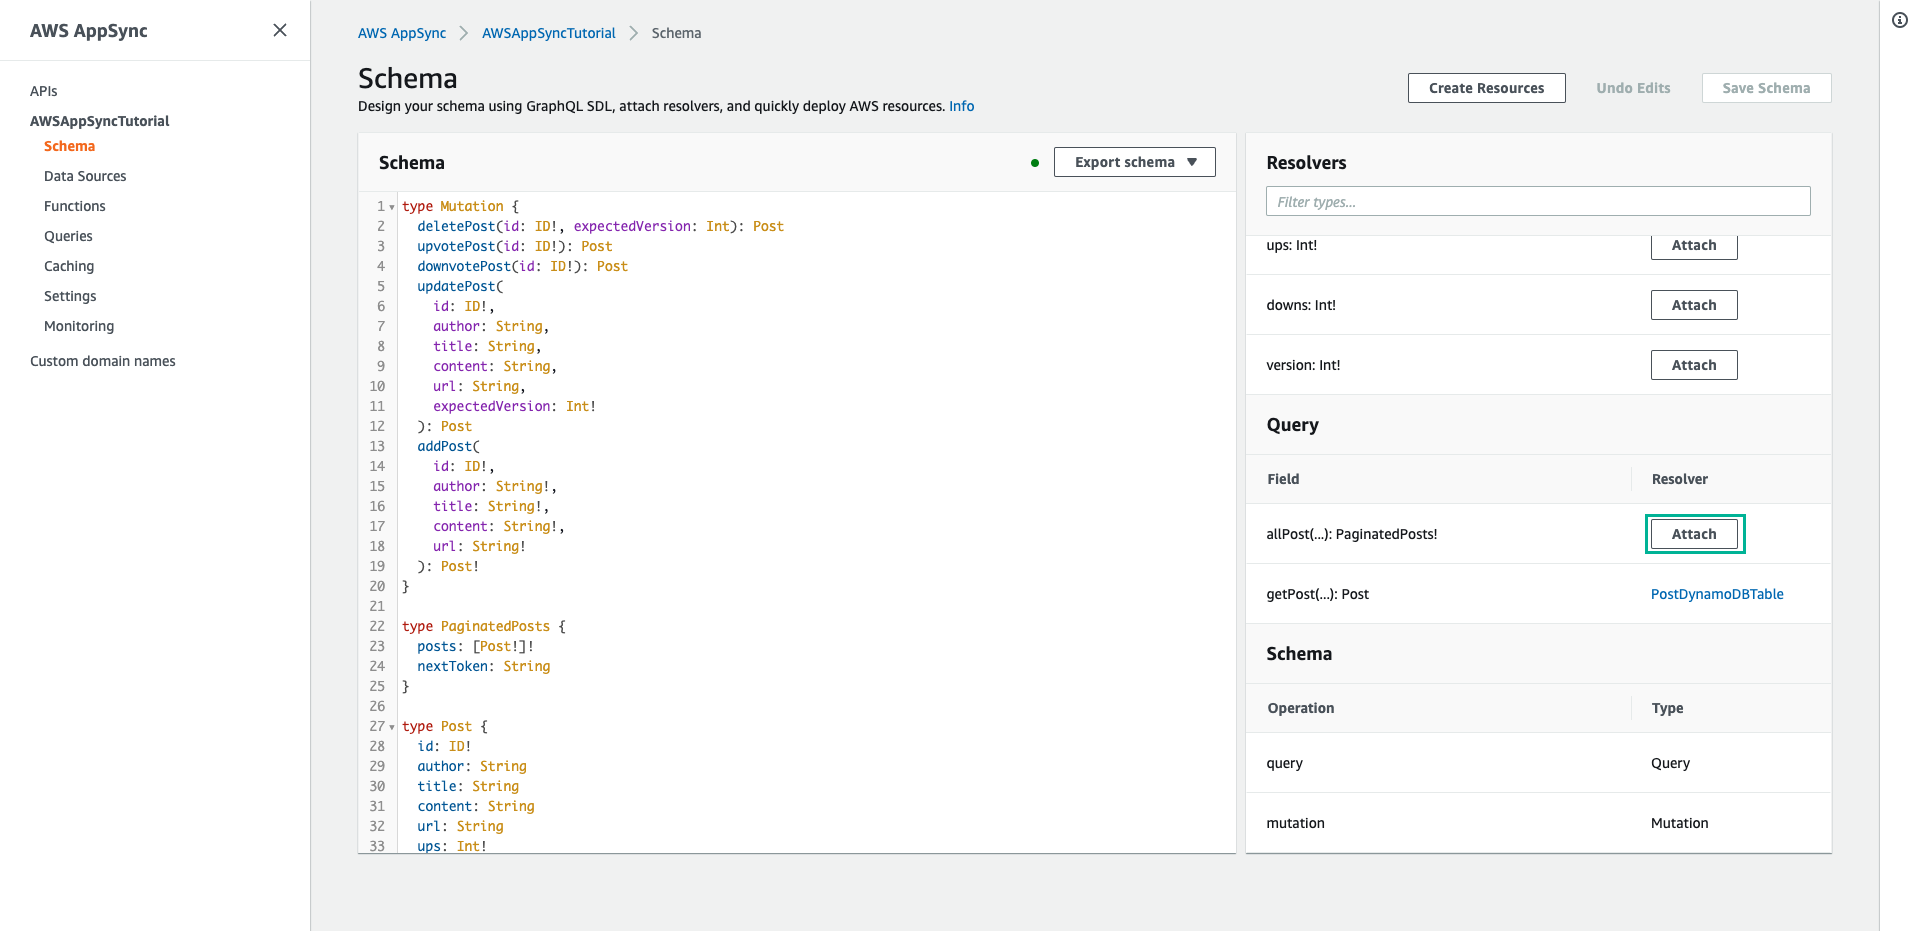
- Next, in the Resolvers pane on the right, find the allPost field of type Query, then select Attach
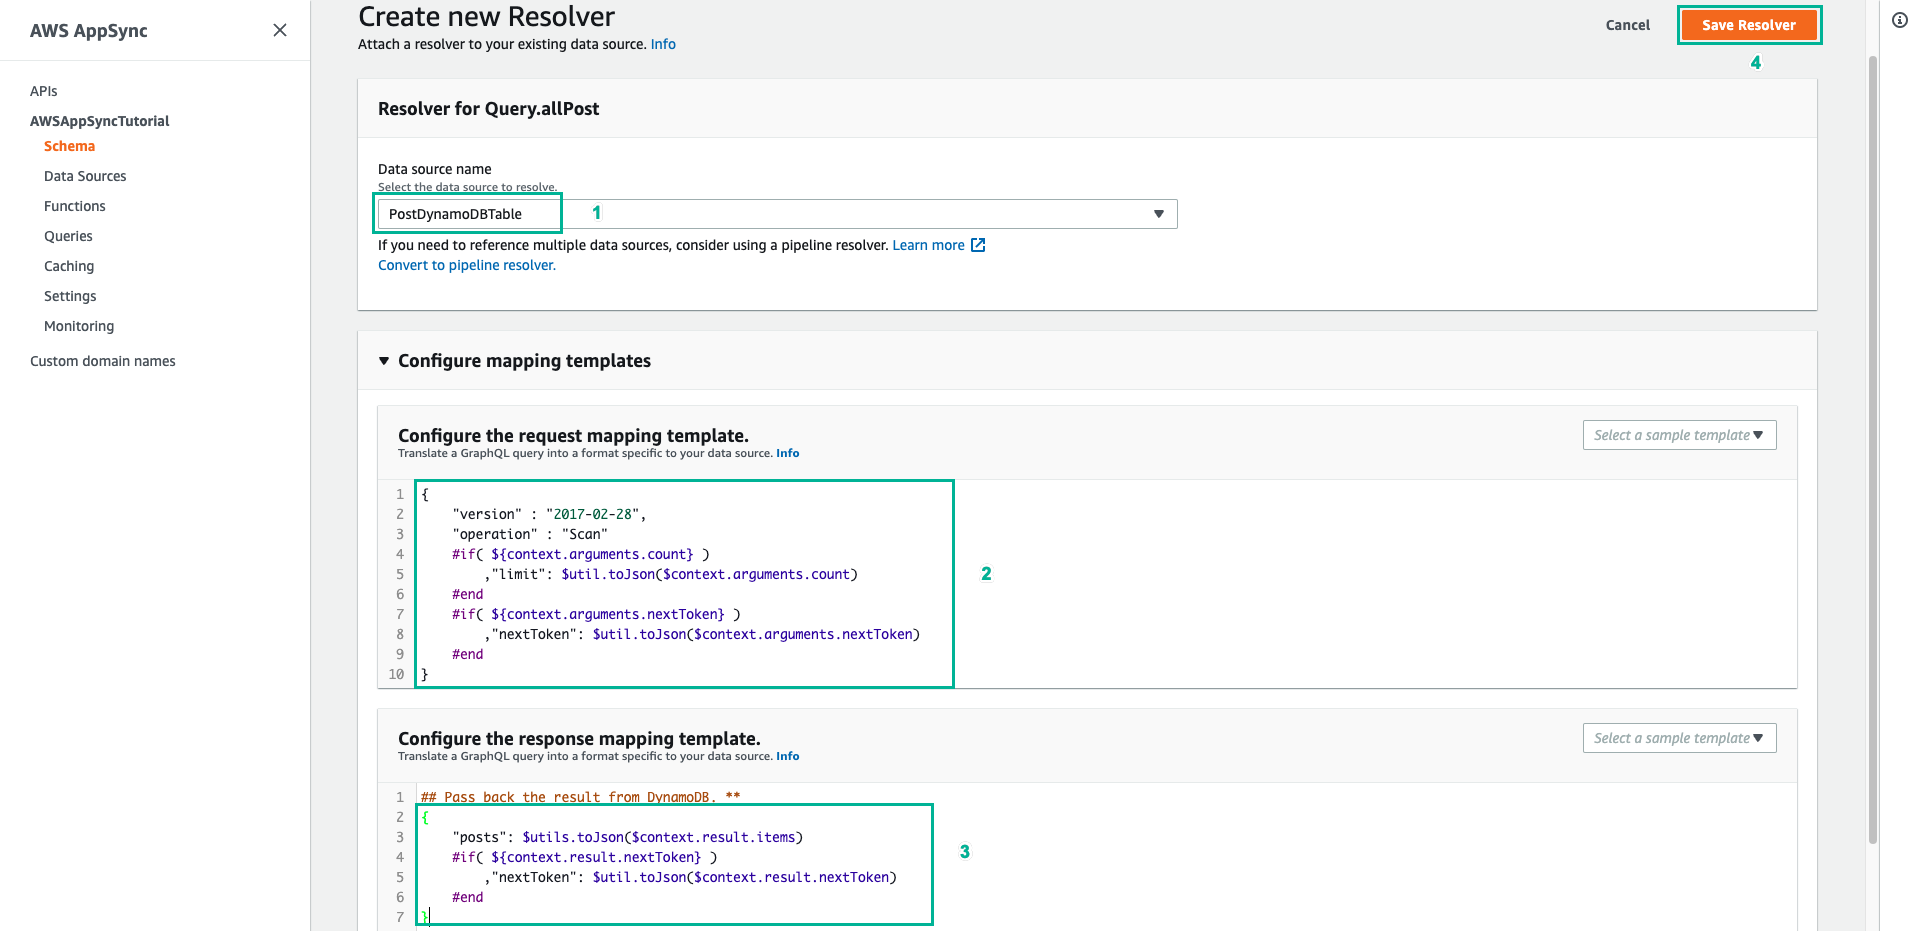
- On the Attach resolver configuration page:
- Resolver type: Select Unit resolver
- Resolver runtime: Select Velocity Template Language (VTL)
- Data source name: Select PostDynamoDBTable
- Click the orange Create button.
- On the code editor page of the newly created Resolver:
- Delete the default code and paste the content below into the Configure the request mapping template section:
{
    "version" : "2017-02-28",
    "operation" : "Scan"
    #if( ${context.arguments.count} )
        ,"limit": $util.toJson($context.arguments.count)
    #end
    #if( ${context.arguments.nextToken} )
        ,"nextToken": $util.toJson($context.arguments.nextToken)
    #end
}
This Resolver has 2 input arguments: count - specifies the maximum number of items to return in a single call, and nextToken - can be used to retrieve the next set of results.
- Scroll down, delete the default code, and paste the content below into the Configure the response mapping template section:
#if($context.error)
  $util.error($context.error.message, $context.error.type)
#end
{
    "posts": $utils.toJson($context.result.items)
    #if( ${context.result.nextToken} )
        ,"nextToken": $util.toJson($context.result.nextToken)
    #end
}
The returned query result is a PaginatedPosts, containing a list of posts and a pagination token. The shape of this object is different from what is returned by the AWS AppSync DynamoDB Resolver.
- Then click Save in the corner of the page to save
- Select the Queries tab on the left menu
- Delete the default code, paste the script below into the Queries section to add some sample posts to the table:
mutation addPost {
  post1: addPost(id:"1" author: "AUTHORNAME" title: "A series of posts, Volume 1" content: "Some content" url: "https://aws.amazon.com/appsync/" ) { title }
  post2: addPost(id:"2" author: "AUTHORNAME" title: "A series of posts, Volume 2" content: "Some content" url: "https://aws.amazon.com/appsync/" ) { title }
  post3: addPost(id:"3" author: "AUTHORNAME" title: "A series of posts, Volume 3" content: "Some content" url: "https://aws.amazon.com/appsync/" ) { title }
  post4: addPost(id:"4" author: "AUTHORNAME" title: "A series of posts, Volume 4" content: "Some content" url: "https://aws.amazon.com/appsync/" ) { title }
  post5: addPost(id:"5" author: "AUTHORNAME" title: "A series of posts, Volume 5" content: "Some content" url: "https://aws.amazon.com/appsync/" ) { title }
  post6: addPost(id:"6" author: "AUTHORNAME" title: "A series of posts, Volume 6" content: "Some content" url: "https://aws.amazon.com/appsync/" ) { title }
  post7: addPost(id:"7" author: "AUTHORNAME" title: "A series of posts, Volume 7" content: "Some content" url: "https://aws.amazon.com/appsync/" ) { title }
  post8: addPost(id:"8" author: "AUTHORNAME" title: "A series of posts, Volume 8" content: "Some content" url: "https://aws.amazon.com/appsync/" ) { title }
  post9: addPost(id:"9" author: "AUTHORNAME" title: "A series of posts, Volume 9" content: "Some content" url: "https://aws.amazon.com/appsync/" ) { title }
}

query scanTable {
  allPost(count: 3) {
    posts {
      id
      title
      author
    }
    nextToken
  }
}
- Then click the Run button (the orange Play button), select addPost (if given the option) to run.
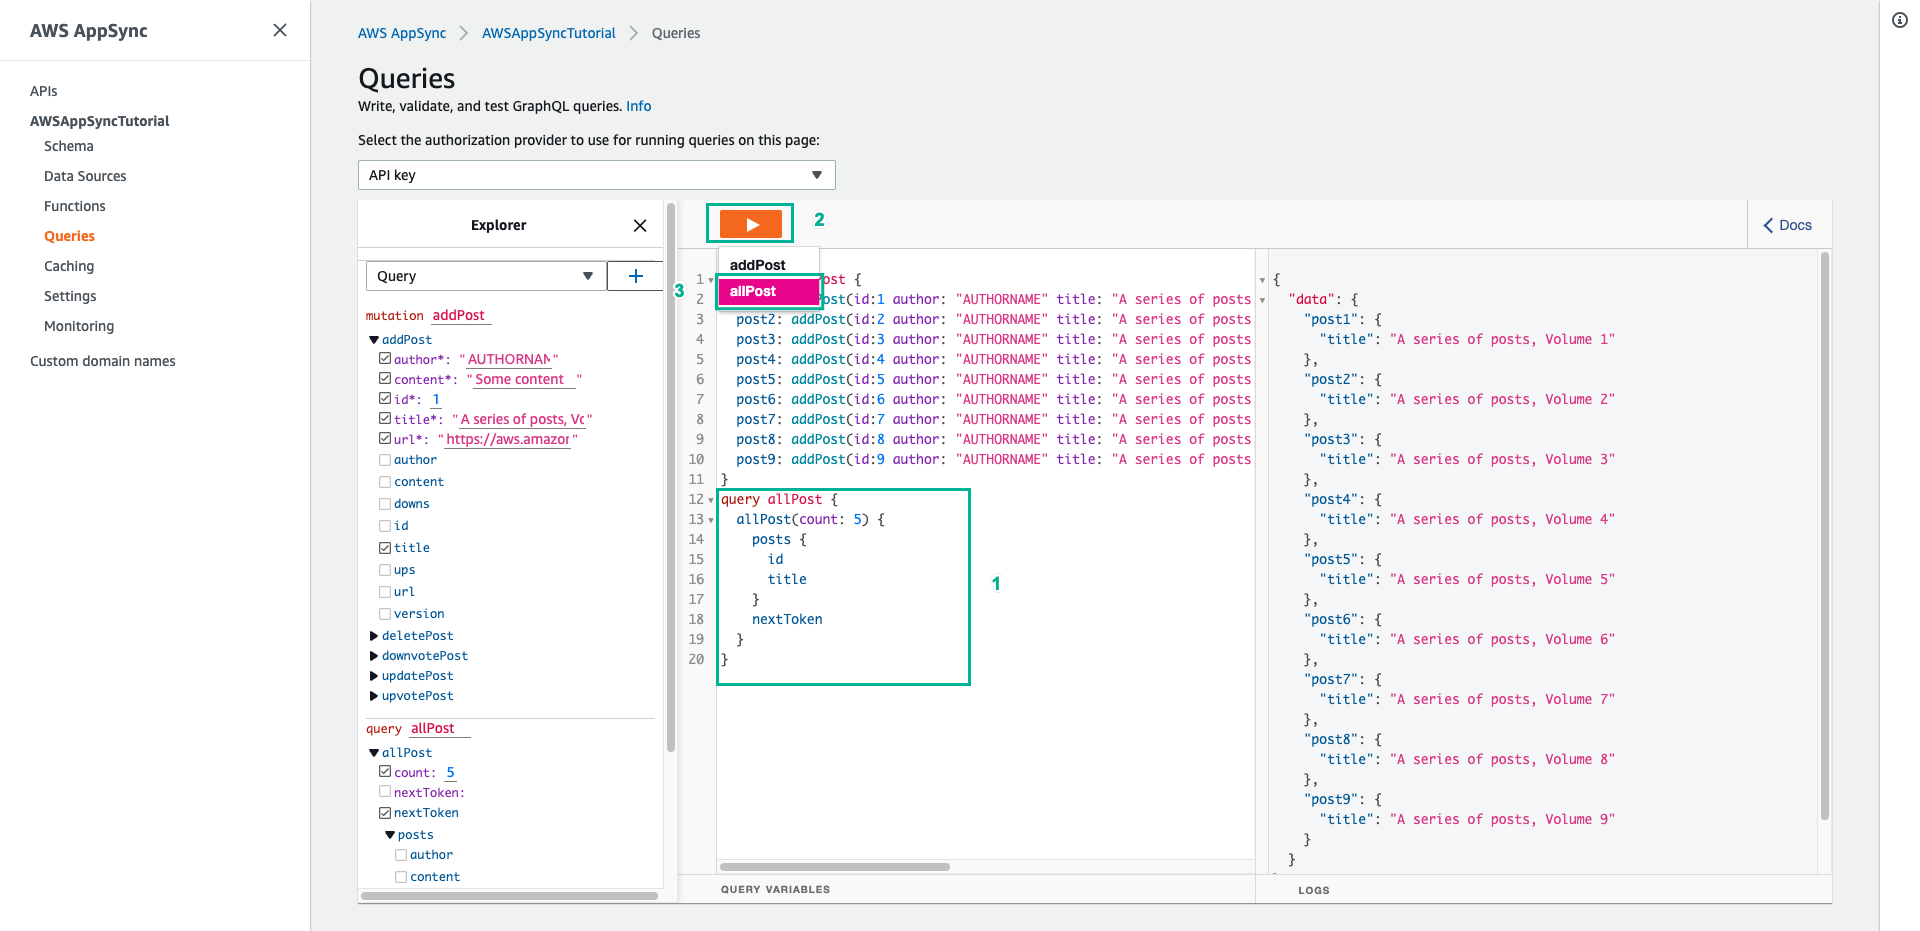
- Now we will try to scan the table. Click the Run button (the orange Play button), select scanTable (if given the option). The result will return up to 3 posts along with a
nextTokento fetch the next pages.
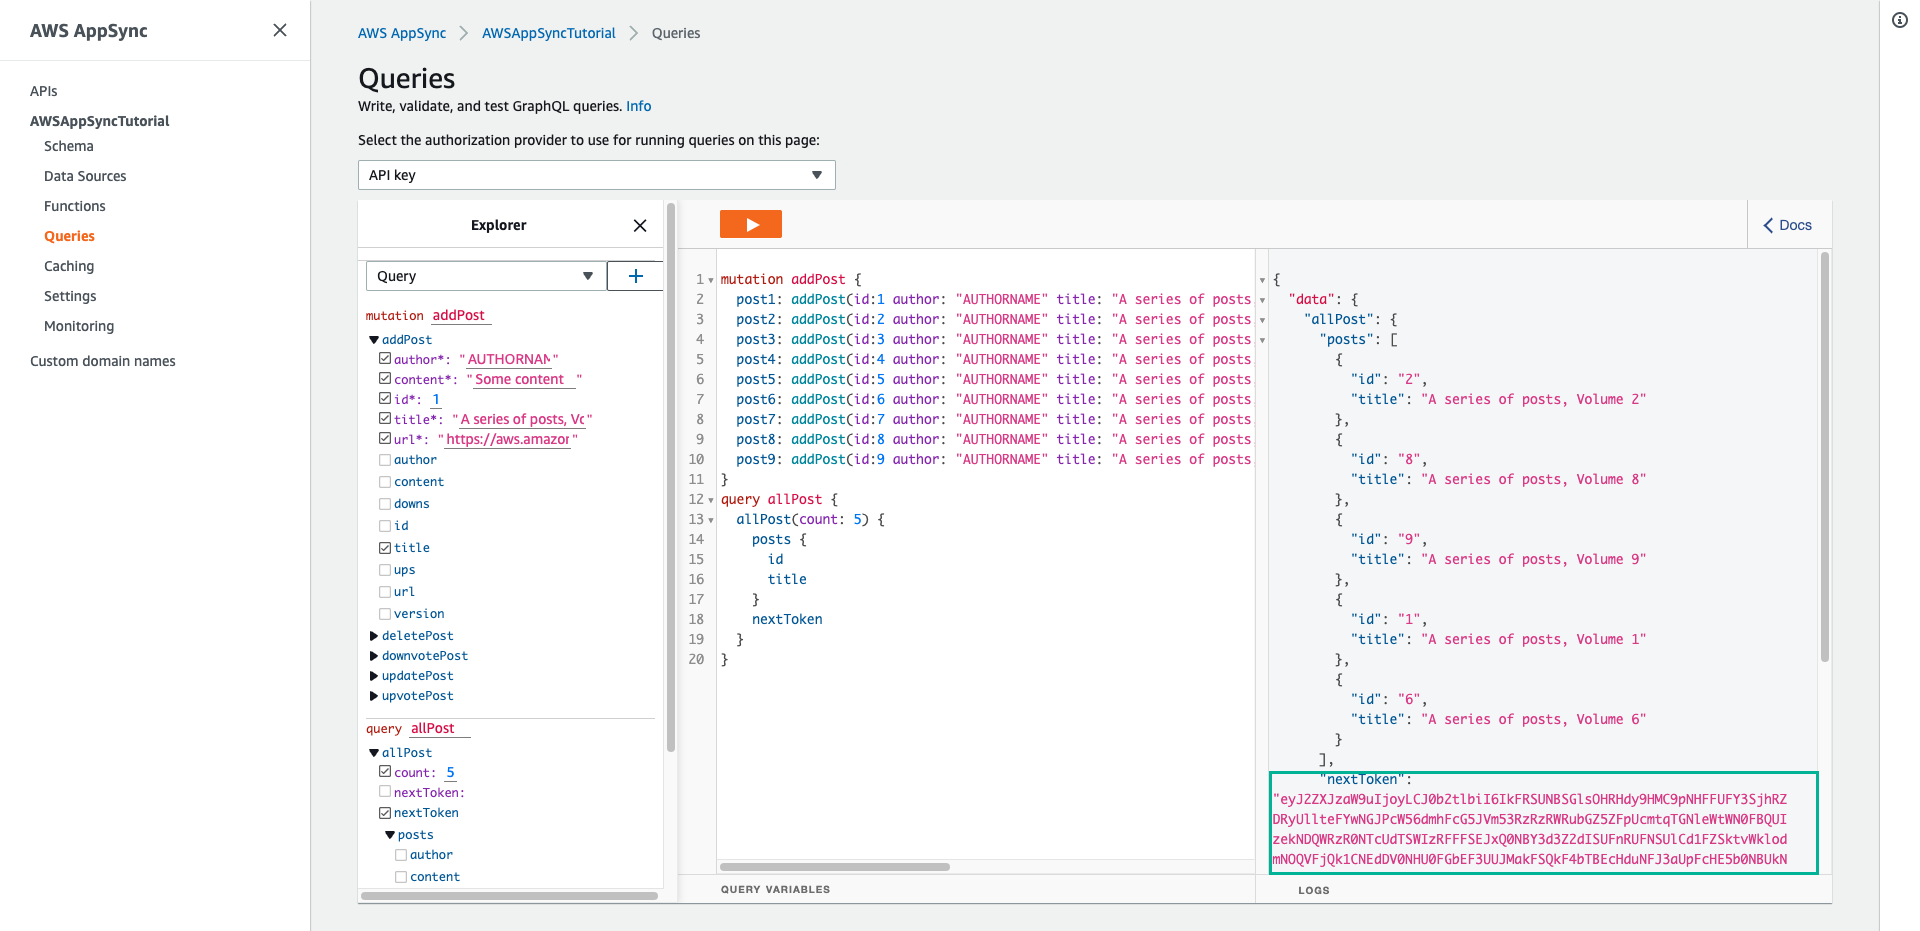
Copy the value of the returned nextToken field (this is a long string code).
Add the nextToken field to the allPost query command, then assign the string value you just copied to it:
query scanTable {
  allPost(count: 3, nextToken: "THE_VALUE_YOU_JUST_COPIED") {
    posts {
      id
      title
      author
    }
    nextToken
  }
}
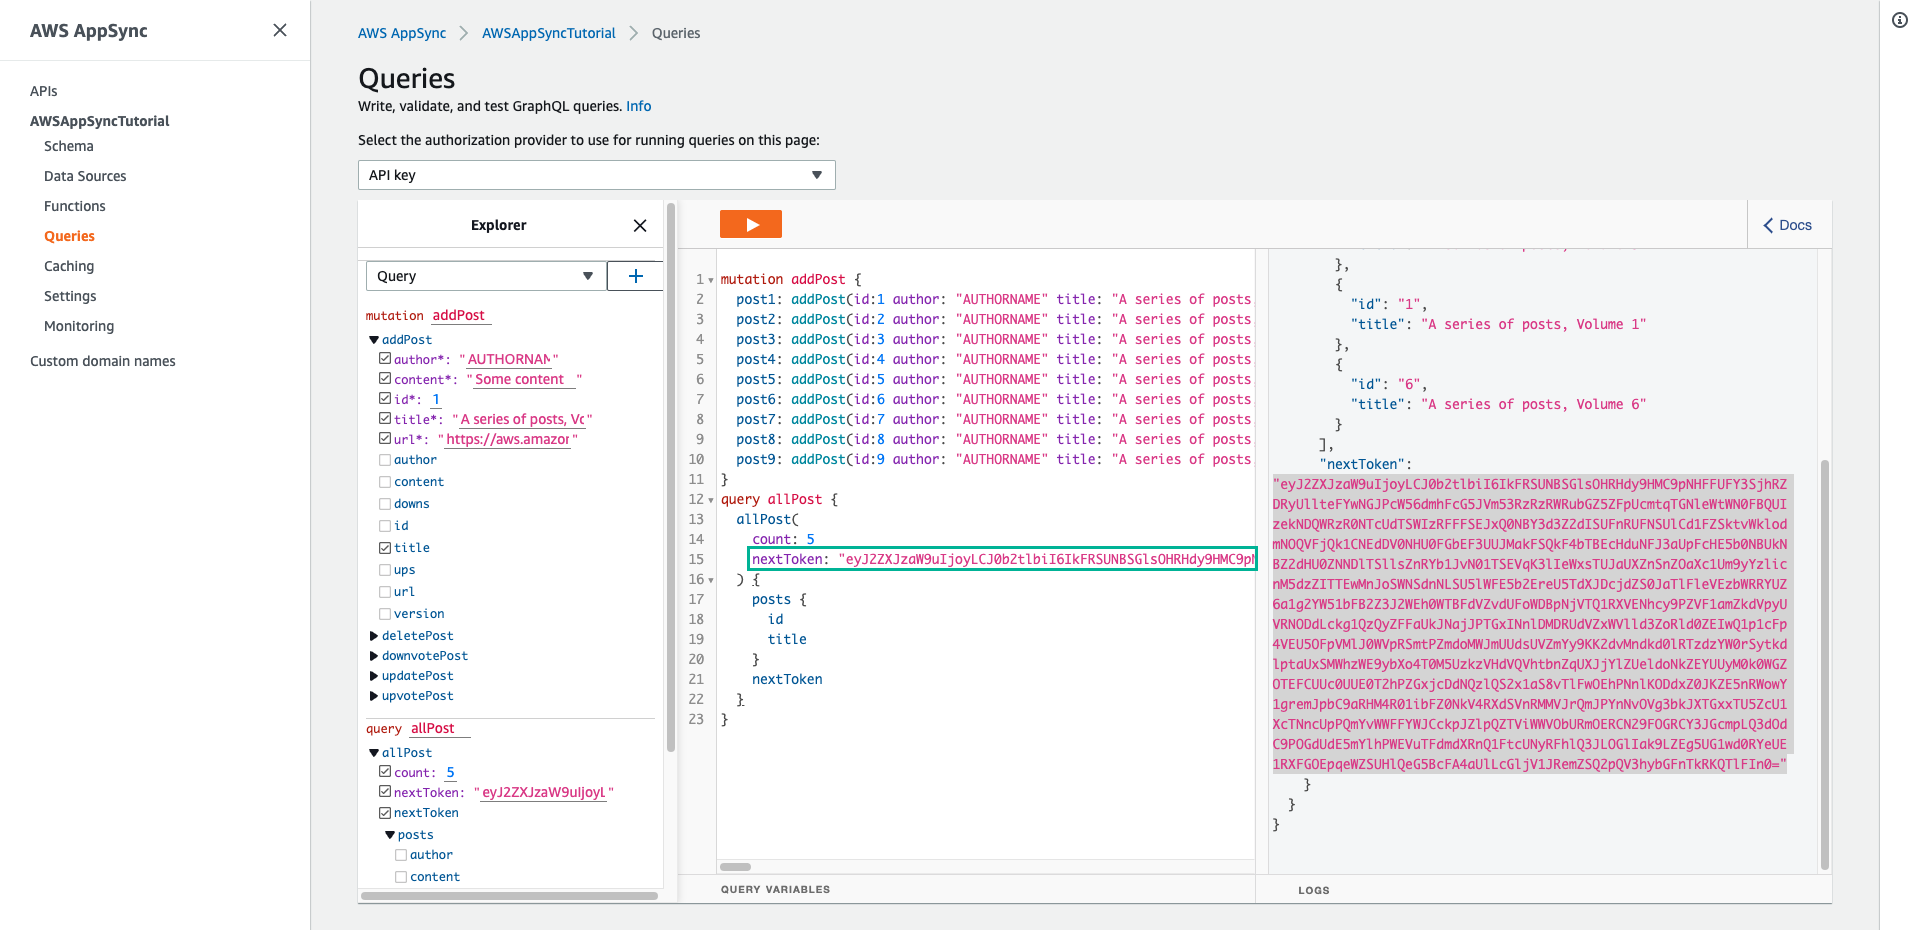
- Click the Run button (the orange Play button) again to see the next posts.
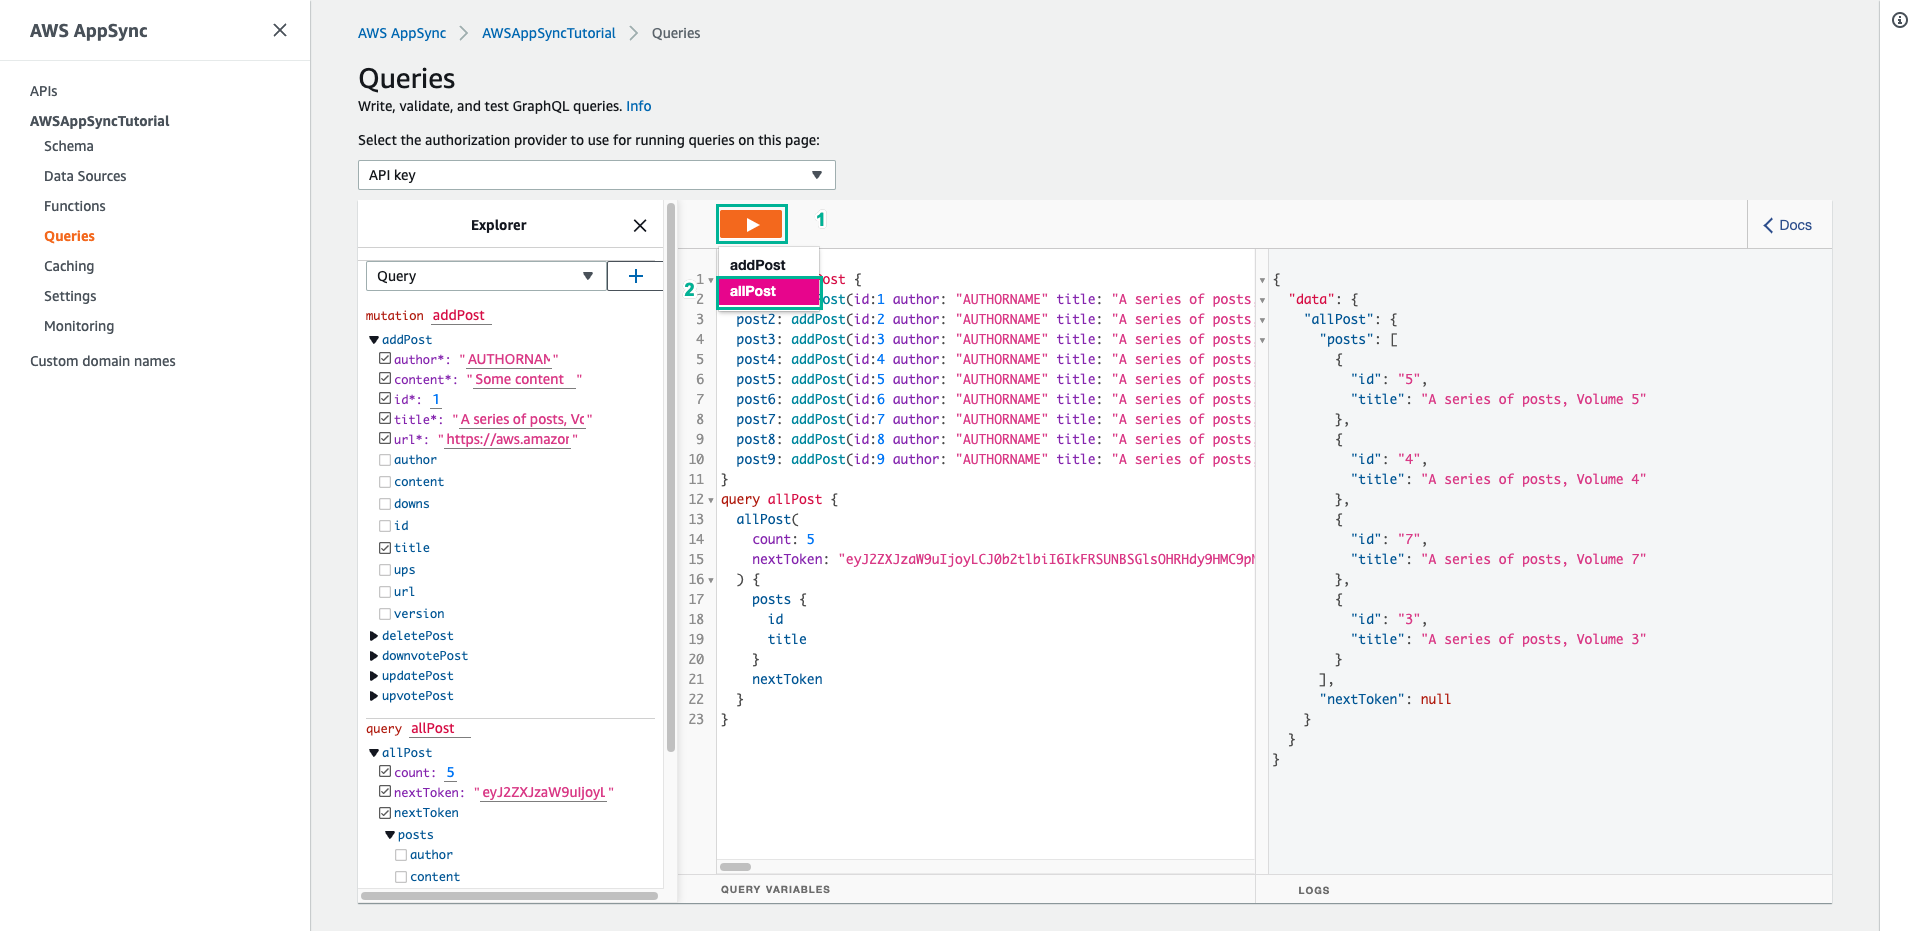
So you have scanned the entire table, returning your desired amount each time.